If you’re just getting started with astronomy, all the new terminology can be really confusing. What exactly is a telescope’s aperture, and why does it matter? In this article, we’ll explain what astronomers mean when they talk about the aperture of a telescope. And, most importantly, we’ll help you understand how and why the aperture makes a big difference.
See also:
When It Comes to Telescopes for Visual Astronomy, Aperture is King – Here’s Why
For any telescope, the size of the aperture is arguably the most important thing to understand. The larger the aperture, the more light can be collected by the telescope. And… the more light collected, the more detail available for you to view.
A larger aperture translates directly into brighter images and better resolution. You’ll be able to see details in planets, distant galaxies, and nebulae that would be impossible with something smaller.
But What Exactly is the Aperture of a Telescope?
Put simply – the aperture is the primary opening that allows a telescope to collect light. This might be the primary lens on a refractor telescope, or the primary mirror on a reflector.
The first and most important job that a telescope has is to collect light. While there are many types of telescopes and there are lots of subtle differences between them, every telescope has an aperture.
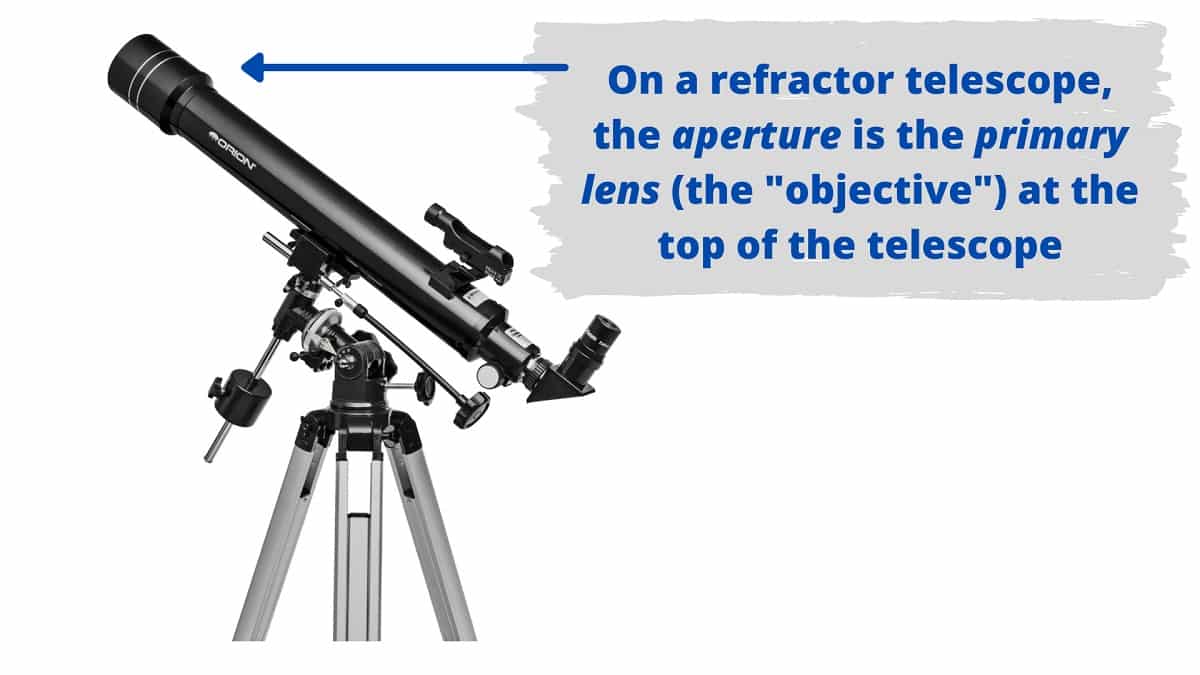
Telescope shown: Orion Observer II 70mm (Equatorial Version Shown Above; Alt-Azimuth Version Can Be Found Here: See it on Telescope.com); Orion Product Images Used with Permission
It’s worth noting that this isn’t really a term that’s unique to telescopes. If you have a digital camera or a pair of binoculars, they have apertures as well – although much smaller than what you’ll find on a telescope. In fact, all optical instruments have them – including the human eye, which has an “aperture” of 2-5mm depending on how dilated the pupil.
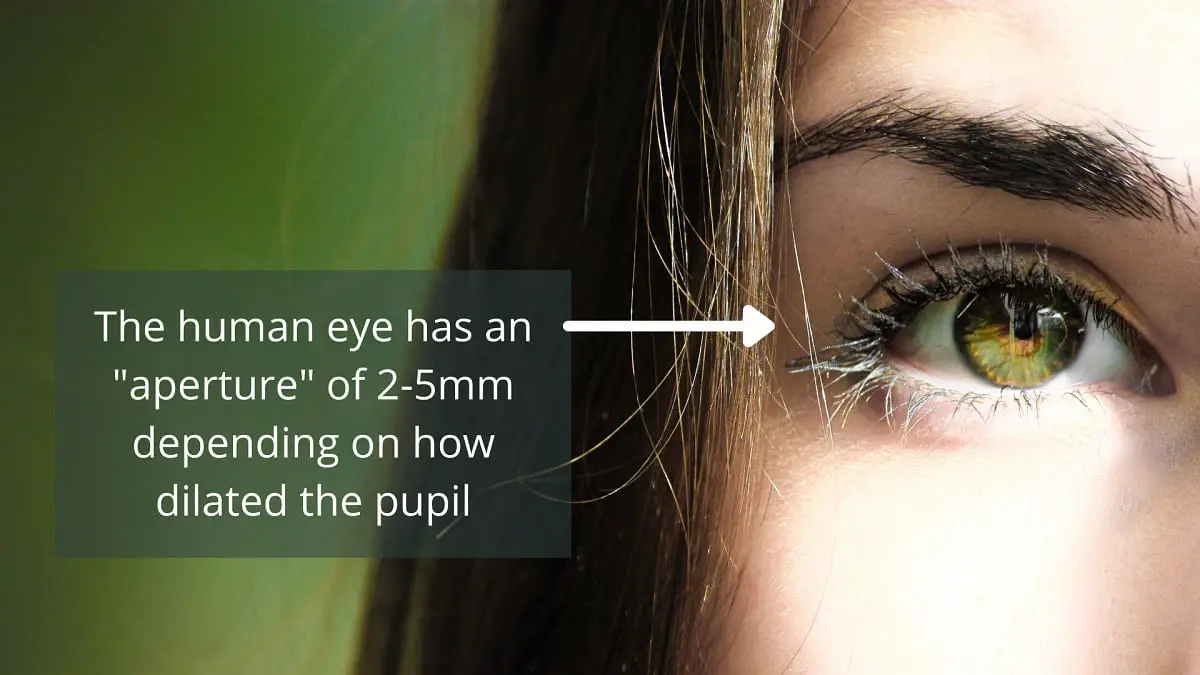
Image Credit: Jan Krnc / Pexels
The opening of a telescope allows it to gather light from the direction that it’s pointing. Once the light is gathered, the telescope’s optical system allows it to focus and magnify the light, often with mirrors and ultimately through an eyepiece so your eye can see the image.
Here’s a Simple Illustration that Explains Why a Telescope’s Aperture is So Important
Have you ever used a water faucet (or a shower head, or a garden hose) with a very tiny opening? Everyone knows how frustrating that can be! The larger the opening, the more water is able to pass through.

Image Credit: Steve Johnson / Pexels
This is a perfect illustration for how a telescope’s aperture works. The size of the opening is directly related to how much light can “pass through” the telescope. A small opening results in a small flow of light through the telescope; but a larger opening allows a lot more light to pass through.
The more light that is available to the telescope, the “richer” the image that can be focused and displayed for your eyes. This matters because a richer image gives you more detail to work with. With more detail available, you’ll be able to make out fainter targets in deep space. And richer images can be magnified with better results, so you can “zoom in” to see your target up close. (More on that later when we talk about magnification.)
How Do You Find the Aperture on a Telescope?
Different types of telescopes have different types of apertures. To keep it simple, we’ll just talk here about the two major types: refractors and reflectors.
For refractor telescopes, the aperture is the primary lens (also known as its “objective” lens). This is the main glass lens located at the opening of the telescope’s main tube. For an example, see the image towards the top of this article – it shows a typical refractor telescope and points out where the main lens is located.
For reflector telescopes, the aperture is the primary mirror. Reflector telescopes don’t use glass lenses; instead they use a large mirror at the base of the telescope to collect light and then redirect it towards additional mirrors within the telescope.
The exact shape of the mirror depends on the specific type of reflector. For example, a Newtonian reflector employs a parabolic mirror as its primary light-gathering element. A Newtonian telescope’s mirror bounces the light off a secondary mirror before it goes through the eyepiece for viewing.
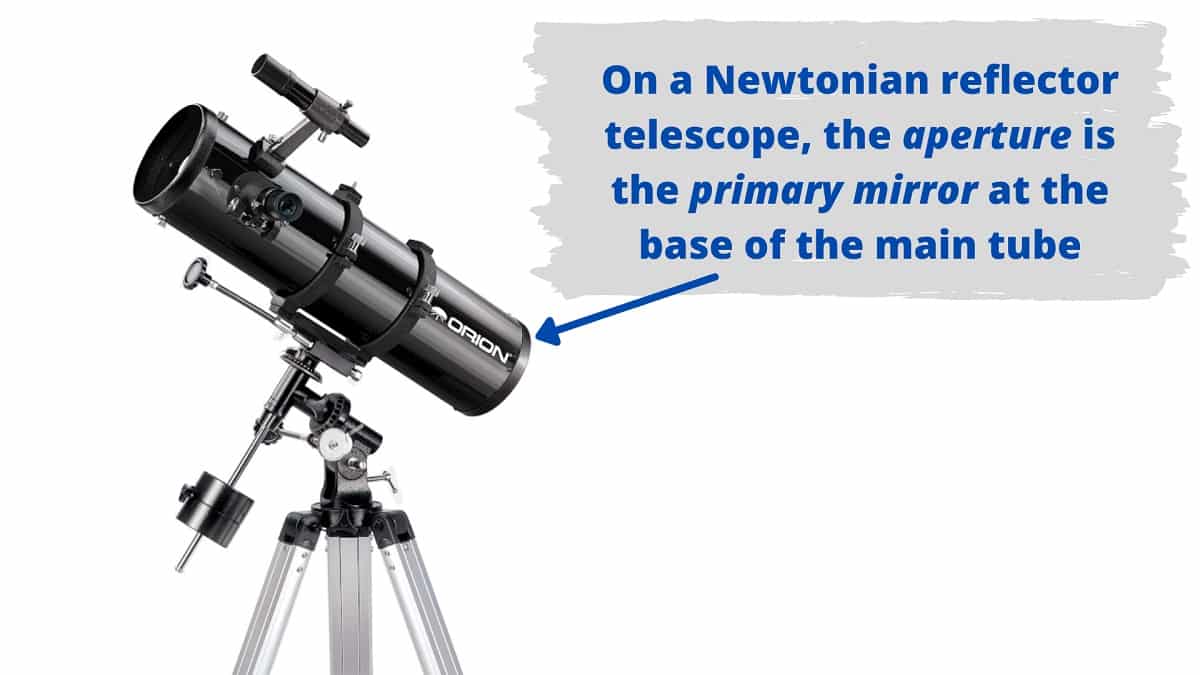
Telescope shown: Orion SpaceProbe 130ST (See it on Telescope.com); Orion Product Images Used with Permission
There are, of course, numerous variations and sub-types of reflector telescopes. But the one thing they all have in common is that the size of the primary mirror is what determines the amount of light the telescope can collect. Here are two examples:
- A Schmidt–Cassegrain telescope is a reflector that employs a primary parabolic mirror similar to the Newtonian reflector; however, it has several additional mirrors allowing the telescope to be much more compact than a Newtonian. (This type fits in a broader sub-category of reflectors called Catadioptric telescopes which use similar approaches allowing greater compactness.)
- A Dobsonian telescope is really just a special variation of the classic Newtonian reflector telescope. The classic Dobsonian design features a Newtonian reflector as the main optical tube, and a special Alt-Az rotating base that serves as a low-cost alternative to a more traditional telescope mount.
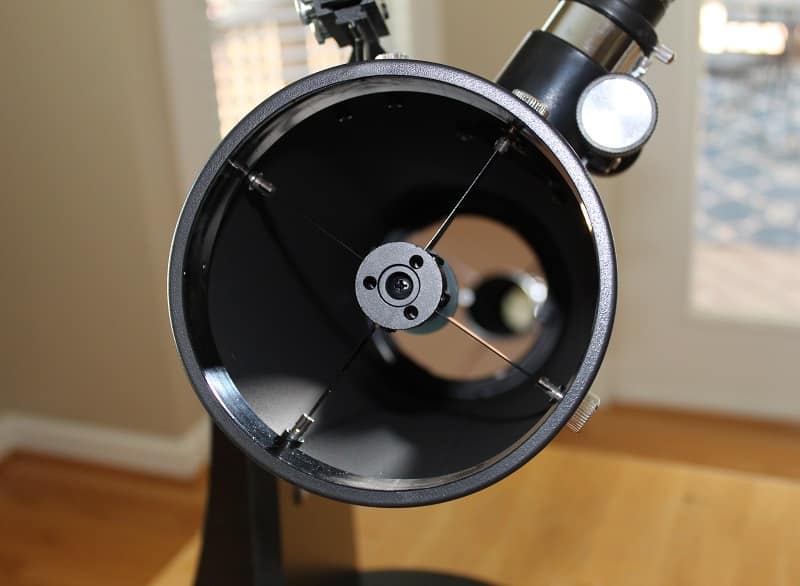
Looking Inside a Newtonian Reflector Telescope – Note the Reflection in the Primary Mirror (at the Base of the Optical Tube). Image Credit: Brian Taylor / TelescopeGuide.org
How Do You Calculate the Light-Gathering Power of a Telescope?
To calculate the light-gathering power of a telescope, all you need to know is the area of the aperture. (You remember the formula for calculating the area of a circle, right? You simply square the radius then multiply by Pi. Or, you can square the diameter instead, and then divide the result by 4.)
So, to calculate the light-gathering power of a telescope, the formula is simply: Area = ( Pi * Aperture^2 ) / 4
With that said, you really don’t need to use the full version of this formula. All you really need to know is that the light-gathering power of a telescope is related to the square of its aperture.
So, this makes it easy to compare different telescopes to see how much light they can gather. Here are some examples:
- To compare a 6 inch telescope with a 4 inch telescope, it’s 6 squared vs. 4 squared. (That’s 125% more power!)
- To compare a 8 inch telescope with a 6 inch telescope, it’s 8 squared vs. 6 squared. (That’s 78% more power!)
- To compare a 10 inch telescope with a 8 inch telescope, it’s 10 squared vs. 8 squared. (That’s 56% more power!)
Here’s a fun exercise: How much more powerful is a 10 inch telescope (254mm) vs. the human eye (5mm)? Answer: 257,964% (Wow! No wonder you can see so much more with a 10″ telescope vs. the naked eye.)
What’s a Good Aperture Size for a Telescope?
For visual astronomy, we generally recommend you get the largest size aperture that fits your budget and usage expectations. (For example, you need to make sure you’re comfortable with the size and portability of the telescope. The last thing you want to do is buy a telescope that will sit in the closet collecting dust.)
Why such a strong recommendation to tilt towards higher aperture? As we’ve explained so far in this article, a larger telescope aperture means more light collection ability. This means you’ll be able to see fainter, more distant objects in the sky. And, when you’re viewing things within our own solar system, you’ll be able to see details that are impossible with smaller sizes.
Keep reading for some more discussion of the various size ranges and what you can see with each.
Telescopes Below 70mm Are Borderline Too Small (Be Cautious Before Spending Your Time and Money)
Generally speaking, you should probably avoid any telescope with an aperture below 70mm. Below that minimum threshold, there’s a good chance you’ll have a better viewing experience with a decent pair of binoculars. (Some binoculars have apertures up to 70mm themselves, plus they are way easier to use).
We’re not saying “definitely” – because there may be a few situations where it makes sense. (For example, if you’re shopping for kids, or if you’re looking for a super small traveling telescope, or if you’re on an extremely tight budget.)
But as a general guideline, you are likely to have a much better experience with a telescope at or above this minimum.
If You Can Afford It, We Recommend Aiming for At Least 5″ (127mm) Aperture or Higher
If you’re on a tight budget but you really want to maximize your “bang for the buck”, the best way to get the largest aperture possible (at any particular price point) is to go for a Dobsonian telescope. Dobsonian telescopes have been credited with making serious astronomy accessible to the non-professional – and the #1 reason for this is affordability. Our favorites are the Zhumell Z-series and the Orion SkyQuest series. (We highlight both of these in our guide to Dobsonian telescopes.)
One special kind of Dobsonian telescope that’s worth mentioning is the Tabletop Dobsonian. Orion and Zhummell both have fantastic offerings in this category and these are well worth a look (the Orion StarBlast 6 which we feature in our guide to the best Orion telescopes, and the Zhumell Z130 which we feature in our Dobsonian guide). What’s great about tabletop Dobsonians is that they are even more compact and easy to use than the larger and heavier versions that sit on the floor. Kids love tabletop telescopes because you can sit on the table right next to the telescope, and it’s easy to “point and view” in any direction.
If you’re willing to pay a little extra to have more features and capabilities, you’ll find plenty of other options available in our Under $500 and Under $1000 categories. These include some of the following types of telescopes:
- Computerized “goto” telescopes (with databases of thousands of targets available at your fingertips)
- Catadioptric telescopes offering large aperture sizes while still being super compact overall (thanks to their more complex optical systems)
- Large refractors that can offer a truly amazing viewing experience (as long as you’re prepared for a higher price tag, because large achromatic glass lenses can get really expensive!)
- Reflectors with equatorial mounts so you can easily track your targets as they drift across the sky
Also, be sure to check out our guide to beginner telescopes.
How Big is Too Big? Beware “Aperture Fever”
Sometimes amateur astronomers go a little crazy and keep upgrading to larger and larger telescopes. This can be a trap – certainly in terms of cost, but also in terms of how often you use the telescope and how much enjoyment you are able to get from it. (It’s also a great way to take up all the usable space in your garage or attic.)
I have a friend who owns an absolutely amazing 15″ truss-style Dobsonian. (15 inches, holy cow!) This is an incredibly powerful telescope. It’s a “light bucket” if there ever was one.
What’s funny, though, is that every time I go over to his house, the 15″ is packed away in his garage. Meanwhile, the Orion SkyQuest XT6 is the telescope he uses most often for viewing. Maybe once a year, he’ll set up the 15″ telescope, but for the most part it’s a dust-collector. (With that said, I’m really looking forward to our upcoming Spring camping trip where we are planning to go together to a dark sky location – he’s planning to bring the 15″, and I’m pumped about that.)
That’s why we said above that you should get the largest size you can afford and that fits with your usage needs. Don’t forget the “usage needs” part of that equation!
How Aperture Relates to Magnification
Another important thing about having a larger aperture is that it allows you to “zoom in” better.
Have you ever tried to zoom in on a low-resolution picture? It’s the same with a telescope. The larger the aperture, the less “grainy” your magnified images – so you can see far greater detail when magnified with larger aperture telescopes. And you can use different combinations of eyepieces and Barlow lenses to further magnify the image.
How to Calculate the Highest Useful Magnification of a Telescope
The general rule of thumb for calculating the magnification capability is to multiply the aperture size (in inches) by 50. Using this formula, a 10” aperture would have a highest useful magnification of 500x.
Final Thoughts | Why Telescope Aperture Size Matters
Bottom line: When choosing a telescope for visual astronomy, a good rule of thumb is to try to get the largest aperture that fits within (a) your budget, and (b) your usage needs. Be careful not to buy a telescope that’s so big and bulky that you’ll never use it. Go for something you can afford and something you can easily transport and set up at your preferred viewing location. For a lot of people, 6-8″ is a good “sweet spot” size.
(Also, if you liked this article, please share it using the social media buttons below!)
Feature Image Credit: KrisCole / iStock

